
Members Pages - MarkLast Updated 13 March 2015
|
Mark recently returned to the hobby of Linka and model making - here are Marks contributions to the website and to help other enthusiasts gain some insight, tips or ideas
|
My Latest Build - 13 March 2015
|
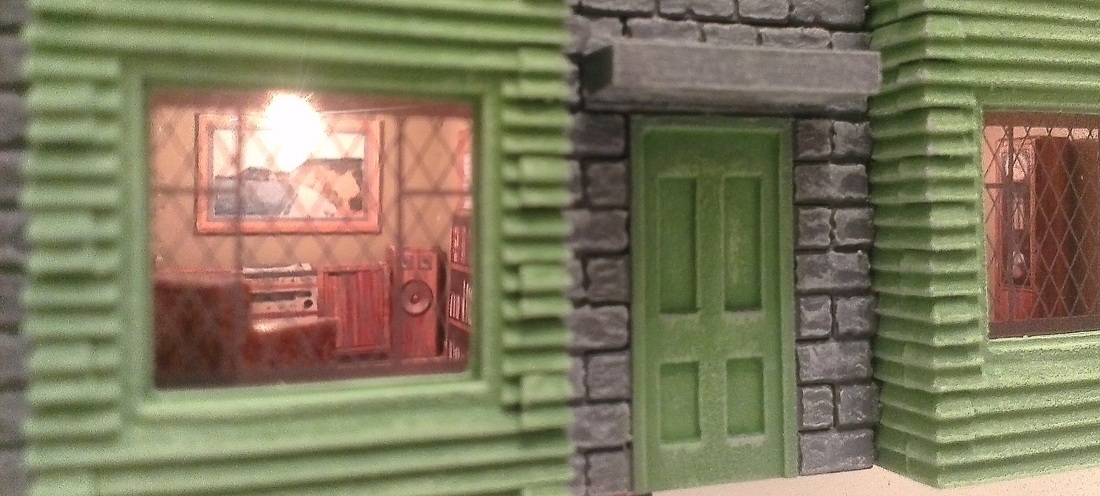
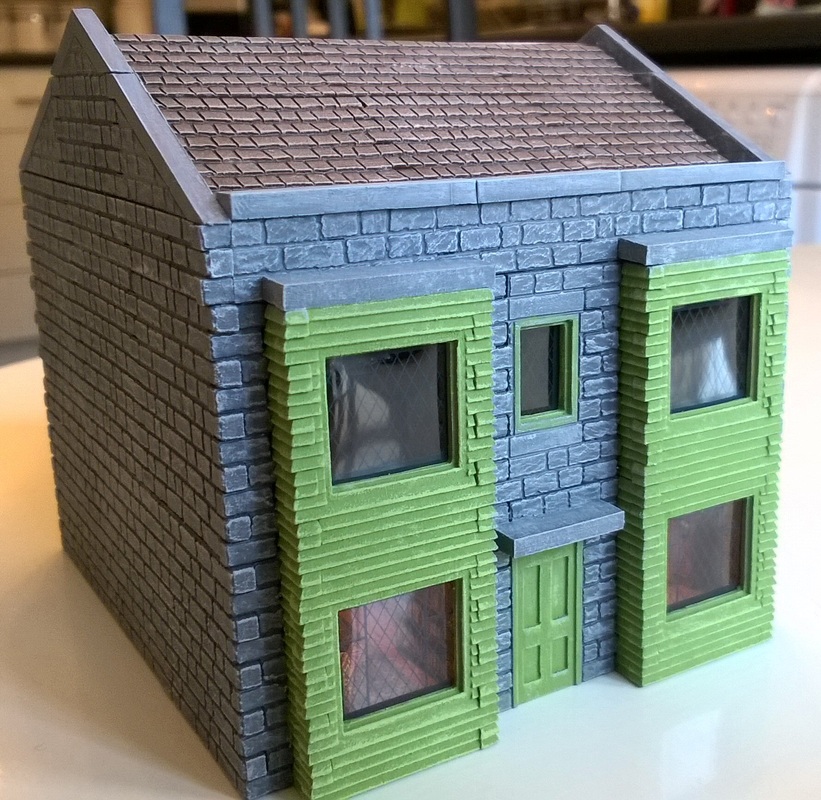
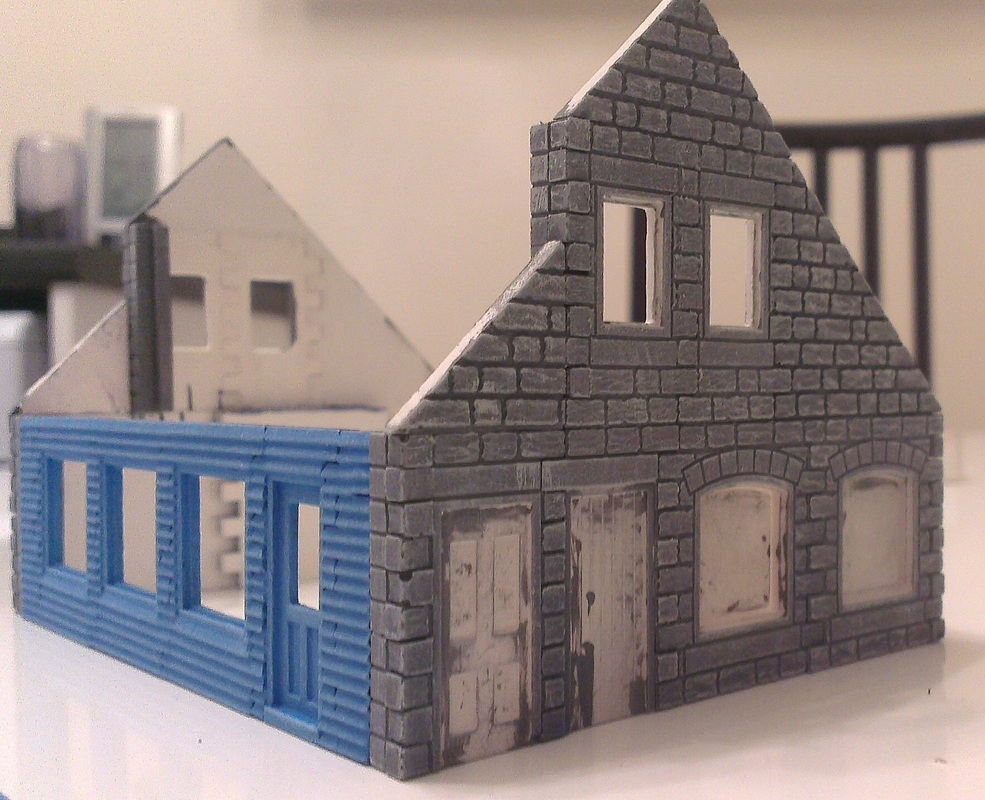
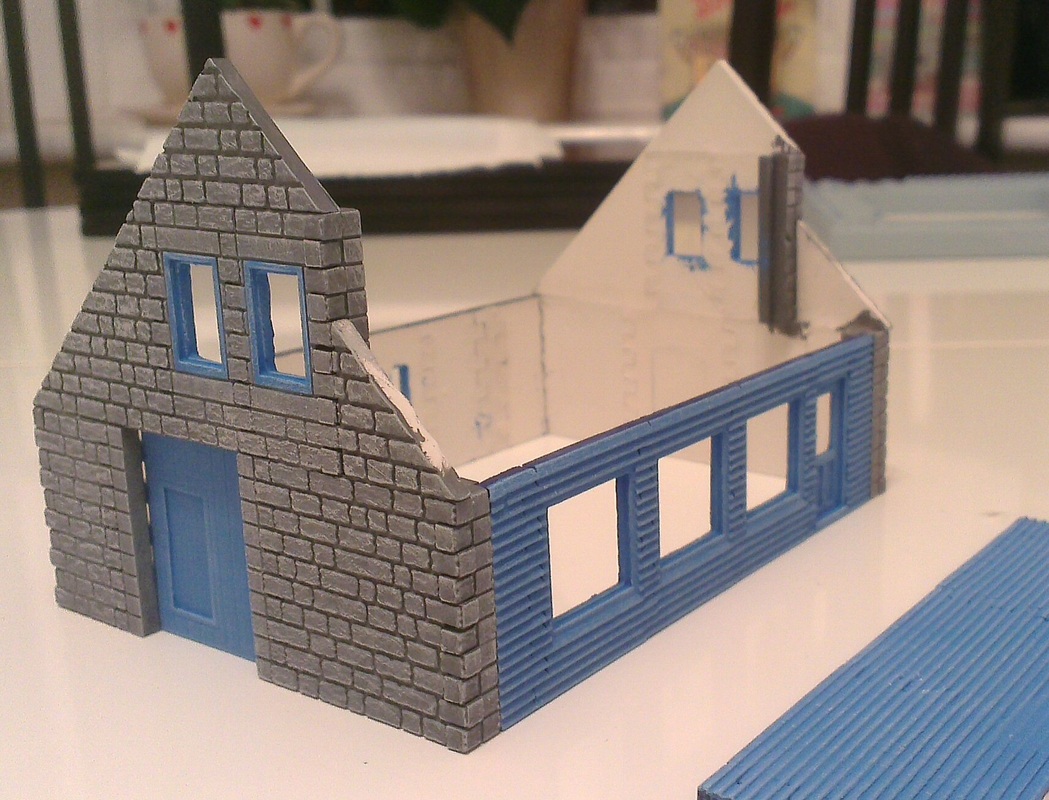
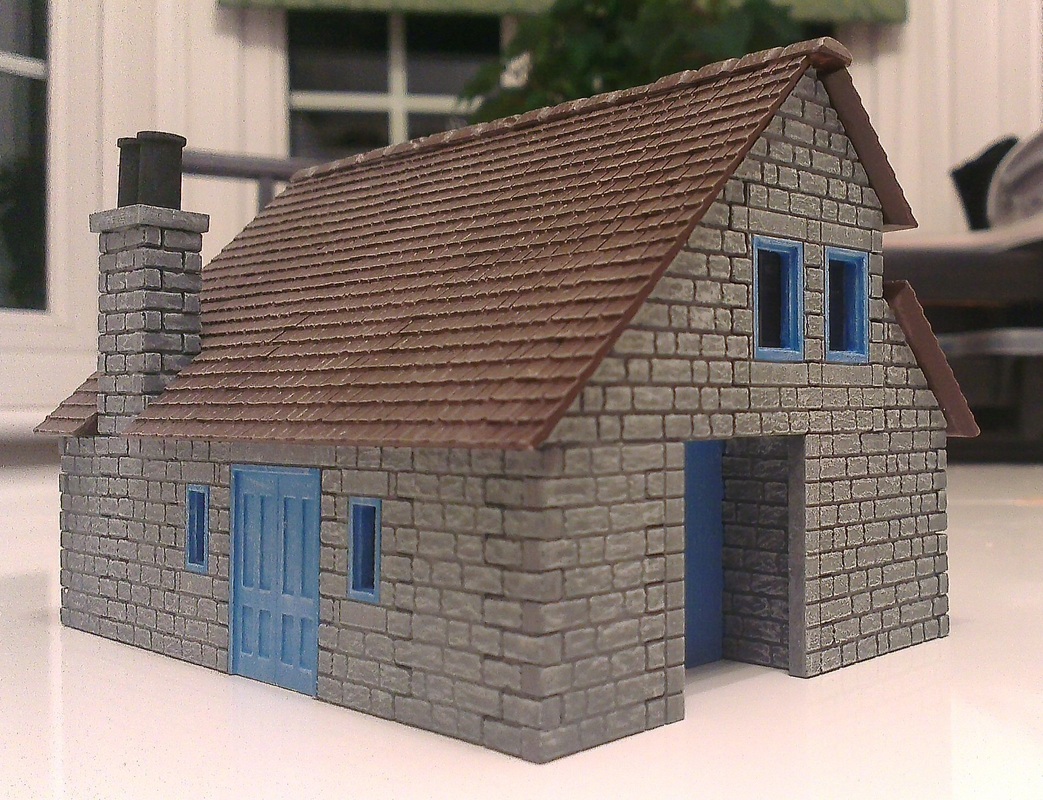
So after a bit of a delay, although there should never really be a rush with a relaxing hobby, I have finally assembled my latest build. Again, using a mix of the lapwood and stone tiles, the intention for this build was a residence that matched the styles of my General Store, but trying out another roof style. This is only my second proper build, so still experimenting and still plenty of techniques to try out and play around with.
This time I have not worked from any plans, and with just an idea, shuffled the tiles around until I arrived at a design I was happy with. All the tiles used for the main structure are standard tiles straight from the moulds.
|
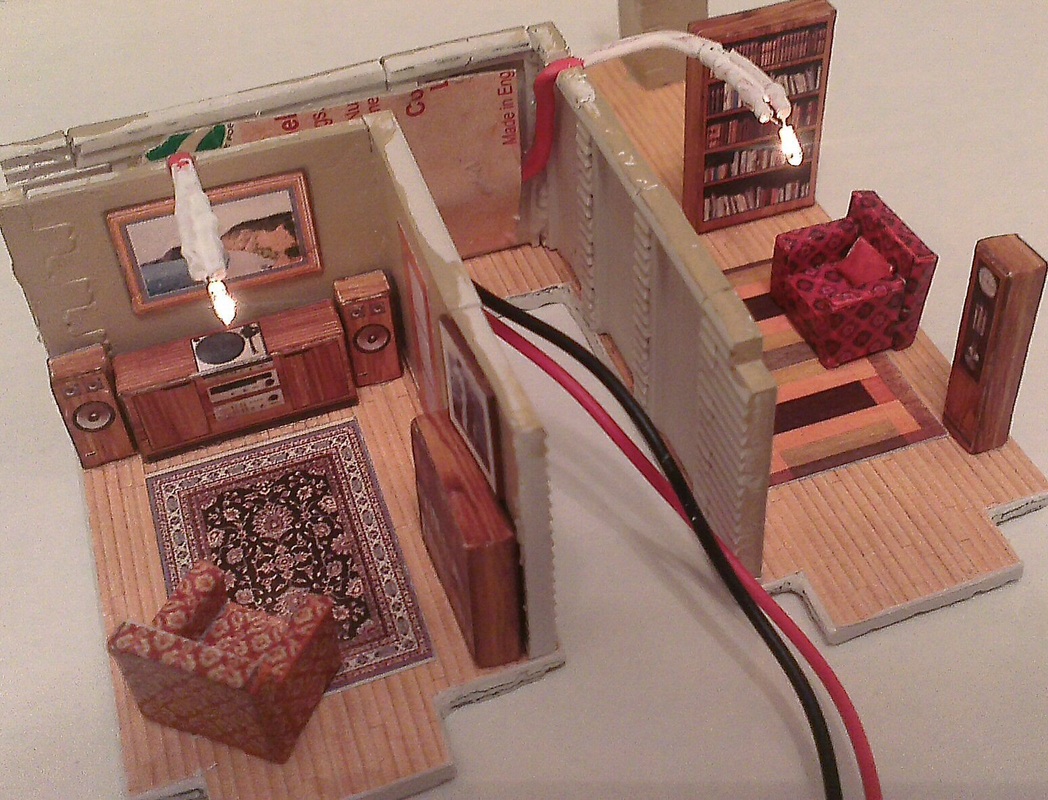
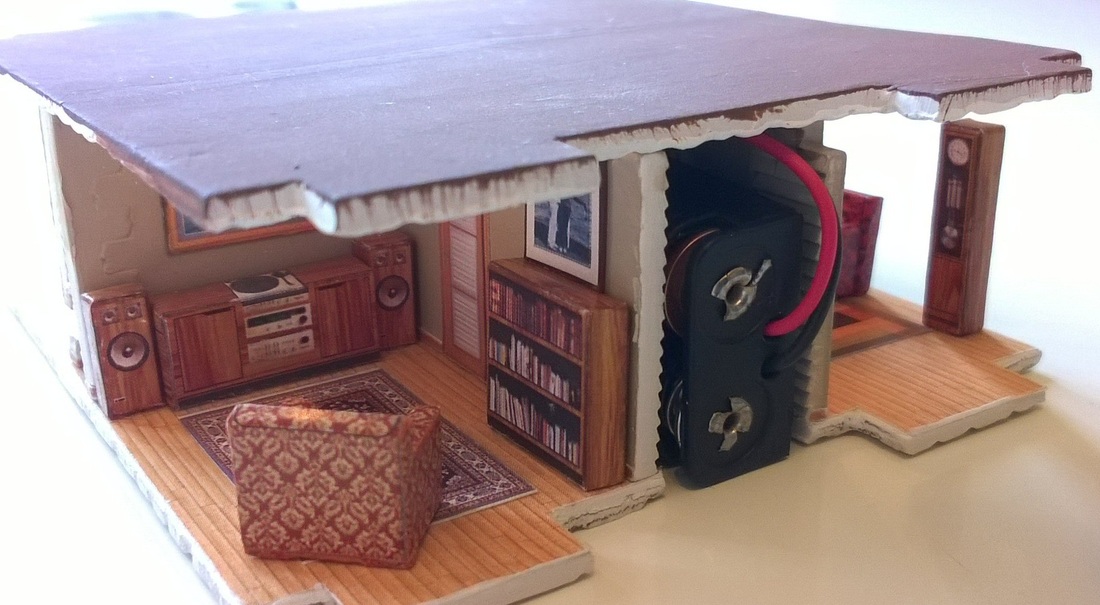
Inspired by the other fantastic models that have been built by members and displayed on this site, I decided to add some lighting and a little extra interior detailing. For this build I decided to start with a few walls and floors and a few pieces of furniture along with a couple of ceiling lights to illuminate it all.
The furniture has been made from printable sheets found online. The printed sheets are glued to a card stock, cut out, and these blocks glued together. The effect is simple but very effective. The lighting was assembled from some 3V wheat grain bulbs and a AAA battery holder, some heat shrink tubing and some careful soldering. Although next time I will try to figure out how to use LEDs, which would give a much longer battery life. The entire interior has been built as a cassette which slots into the bottom of the building, just in case I need to remove it to replace a bulb! |

My First New Model - April 2014
|
Remember to check back often to see additional content as it is added to this page
|
Having recently returned to this hobby I thought I would share some pictures and words about my progress.
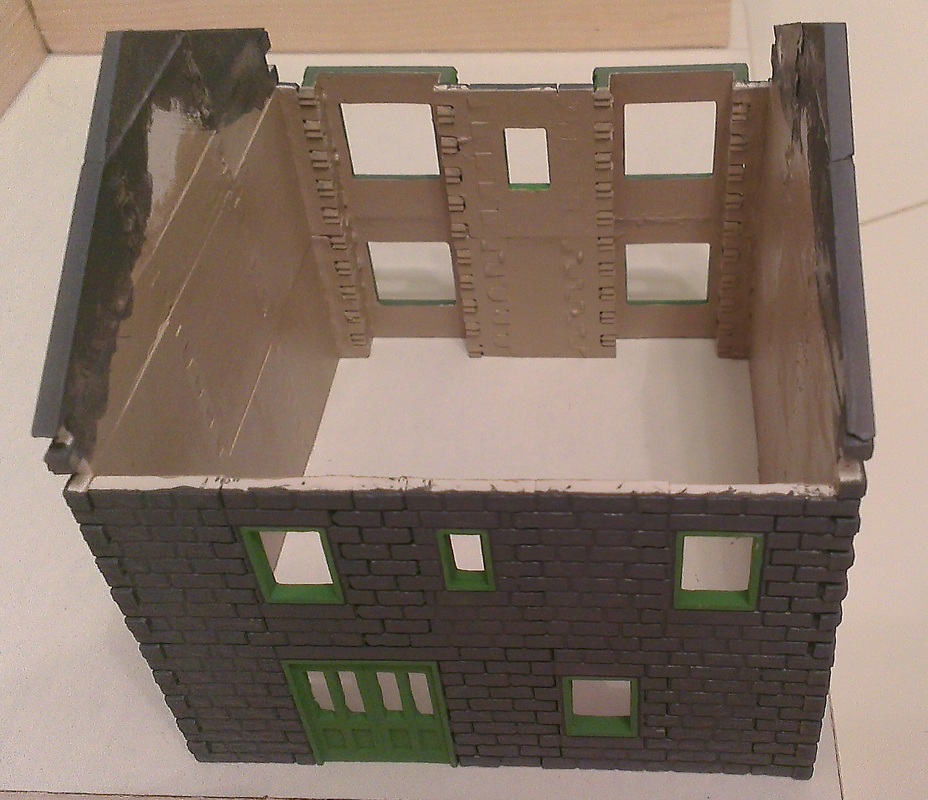
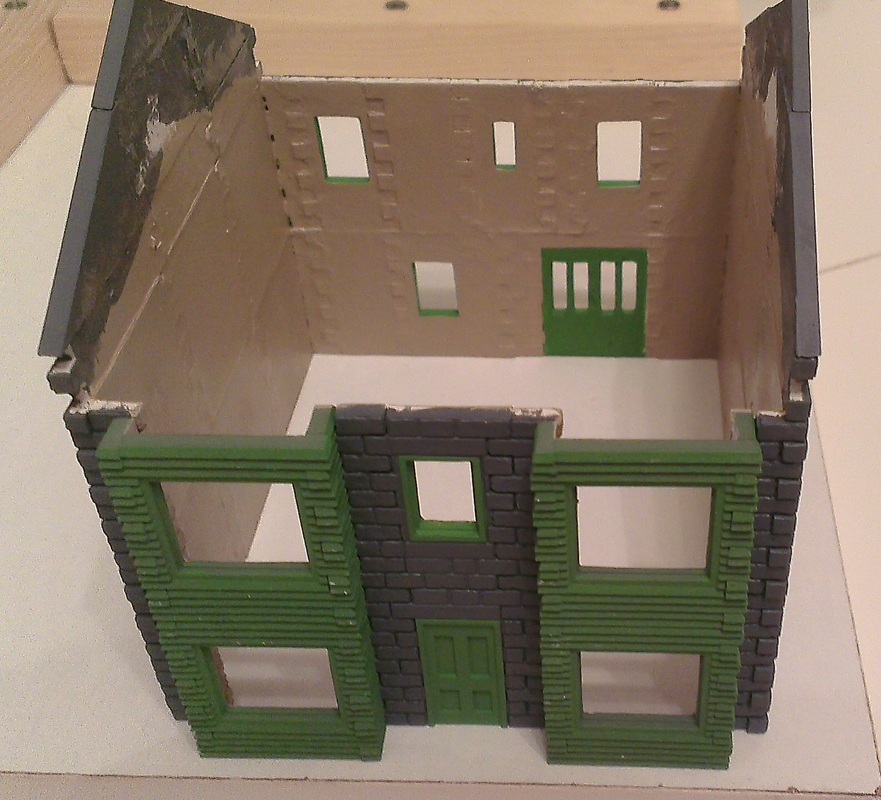
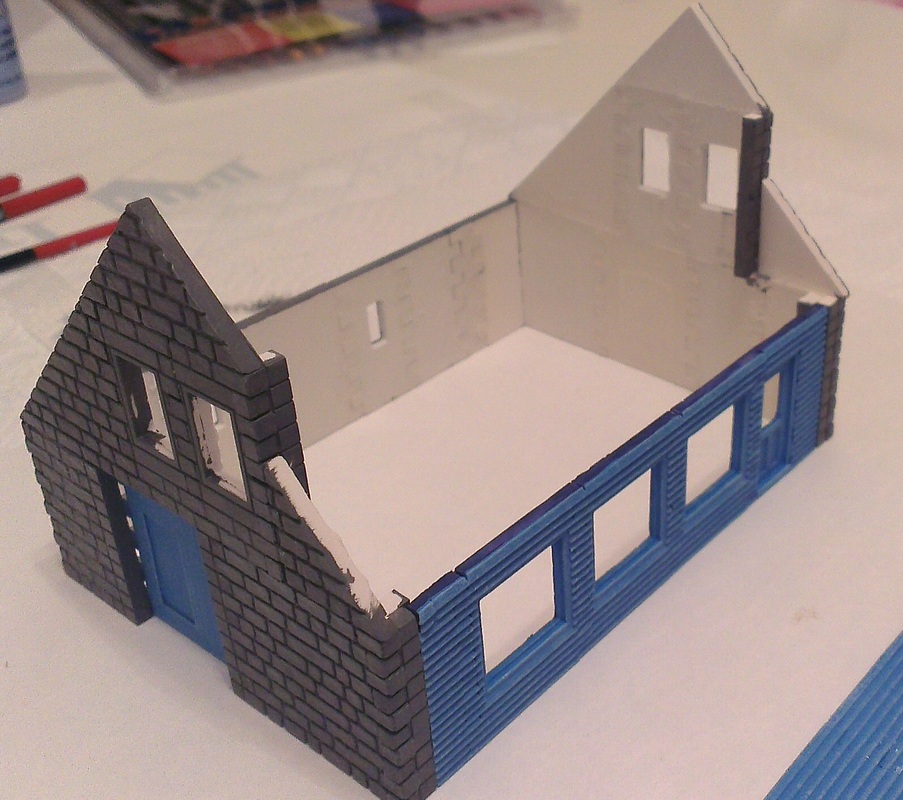
As a practice piece I put together the small cottage and tried out some painting and dry brushing techniques, just to refresh my memory! And with my confidence restored I chose my next project. Using the general store as inspiration, I decided to experiment a little using different finishes, so I chose to build the main structure using the stone components and the store facings using lap wood. Immediately I ran into problems with the plans for the general store which appeared to produce front and back walls of different lengths! Or maybe I just miss-interpreted the plans? So I pressed on with my own arrangement using the original as a concept guide only, moving components around until I was happy with the balance. Once the main wall sections were built I decided to start painting them before assembling the sections together. For paint I am using cheap craft acrylic paint and some old brushes I had laying around. Here I applied several complete coats of mid grey to all the stone work. This mix was watered down to get a good coating that didn’t clog up and surface details and would ‘run’ nicely into all the cracks between components. Once the base coat was dry I proceeded with two rounds of dry brushing. The first round with a lighter grey and only a little water. The second a much lighter grey which was not thinned at all. And another lesson in patience learnt, take your time building up the dry brushing layers applying the paint sparingly and with a light hand and you will be amazed how much detail magically appears! And also learn when to stop before the detail disappears again and you end up with a lighter coloured building! Still some way to go before I have this mastered. And always remember, if you go wrong, you can just start again with a coat of the base colour. After painting the stone walls, exactly the same painting techniques were then used for the lap wood sections and the doors and window frames. Just to show how the sections will fit together I loosely assembled them in the pictures. For the roof sections I intend to use the shingle roof tiles, although I haven’t made these yet. When I have completed this model I will share some more images. |
Completing the General Store 18 May 2014
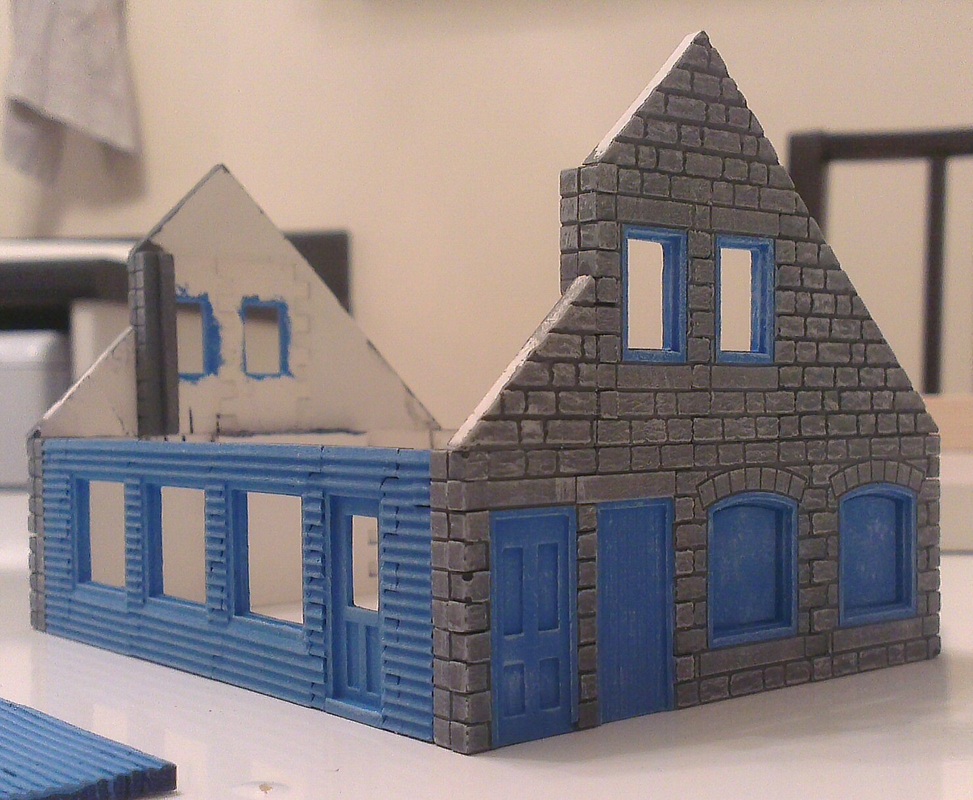
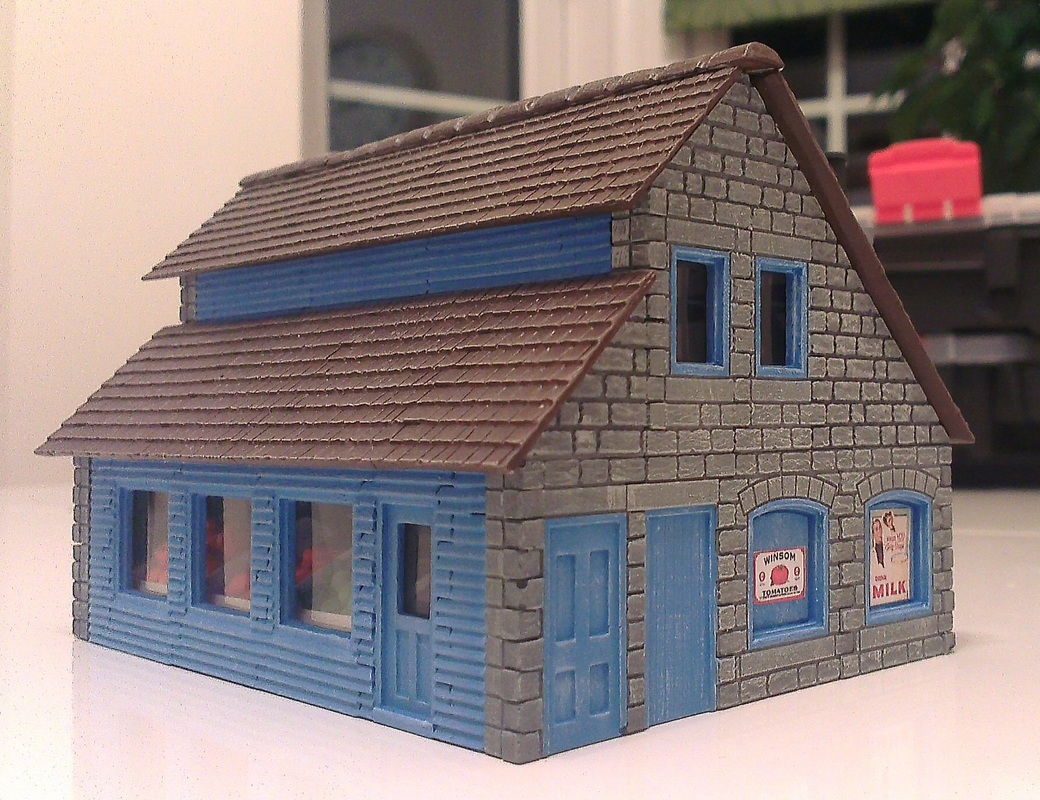
My general store is now complete, it took a little while and here it is. As I mentioned previously this build was based loosely on the general store plans which I modified and grew as the build progressed. A few of the changes include a chimney which I have added on the back of the building to keep the occupants warm, and a large covered door to the side of the building for deliveries. The two large windows on the side of the building have been left “boarded up” and make an ideal location for a poster or two. For the roof crest I have used the capping piece from the PS1 Stone Wall Sections mould which hopefully fits in with the rustic shingle roof tiles.


|
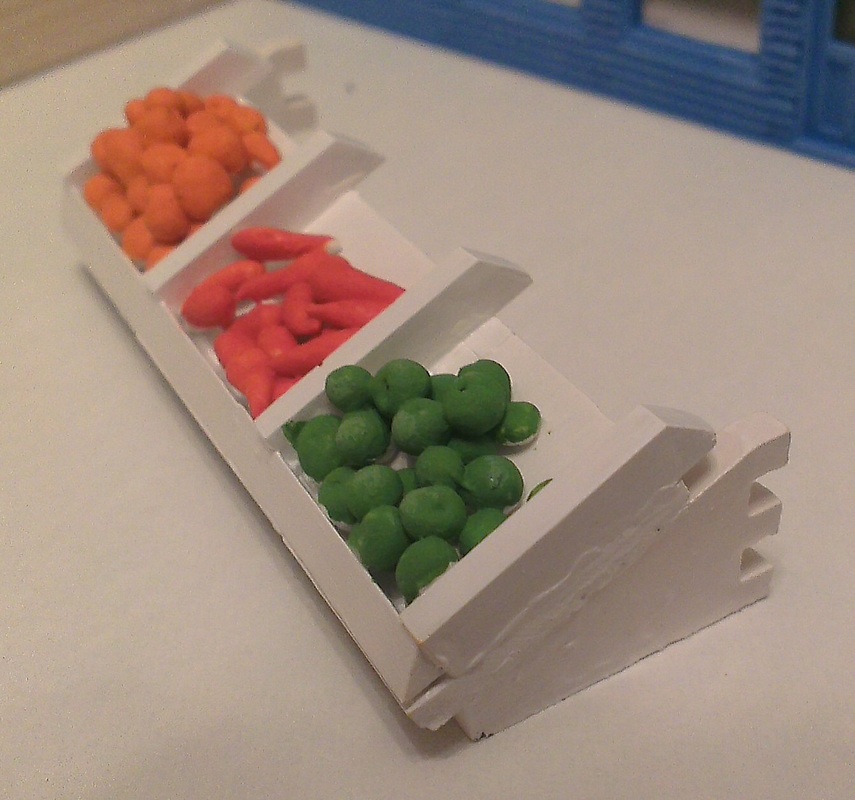
The big question of course, “what will the shop sell?”. I decided that my general store would be a grocery store, so using some scrap parts and off-cuts I decided to build a window display which would consist of a simple sloping surface with dividers for the different produce. For the produce themselves, these were made from air drying modelling clay. These were kept as simple as possible, small balls of clay for apples and oranges, and small tapered rolls for the carrots. I didn’t worry too much about the scale of the produce, and just tried to achieve the effect. These were just pressed onto the ‘window display shelf’ while the clay was still wet, although some were still loose when dry, so I just “painted” over them with a watered down mix of glue which held them nicely.
|
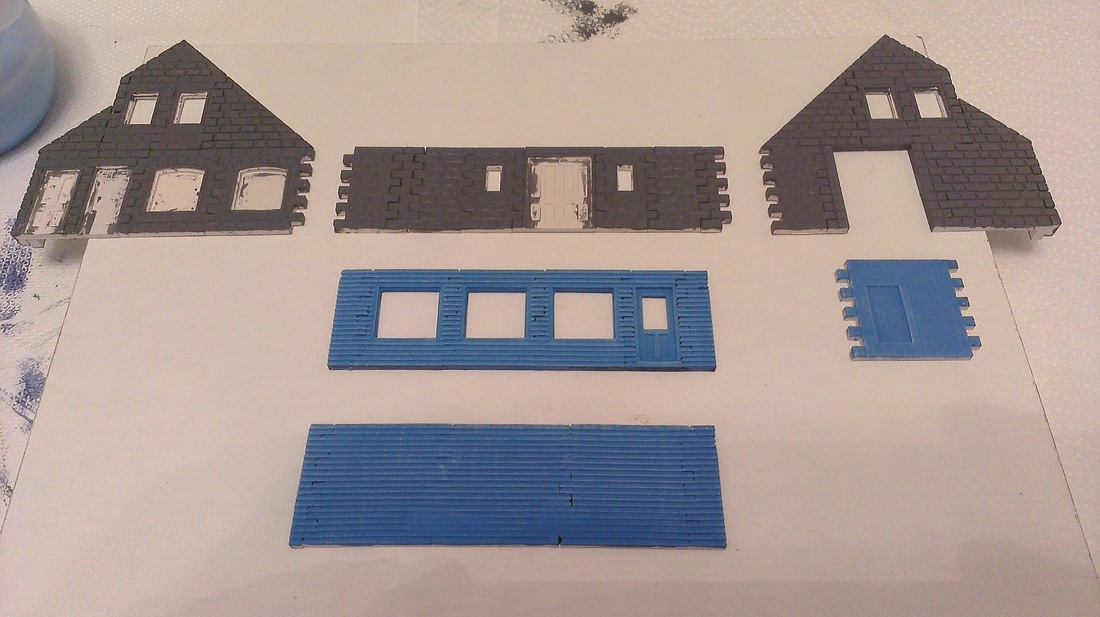
While this build took place it became apparent early on, the importance of a couple of points, as well as keeping the face of the tiles flat, the base also needs to be as flat as possible, (this can be a problem if any of your moulds are slightly out of square), and then when final assembly takes place, that the walls sections are assembled with good right angles, assuming your making a ‘square’ building of course! To help achieve this I have made a simple ‘construction board’. Put together from an old, small kitchen cupboard shelf that was kicking around the garage and two short lengths of baton carefully positioned and fixed in place at a right angle to one another (you can see the board in the picture). Now when I’m constructing the individual wall sections I can glue them flat and ensure the base is straight at the same time by joining the pieces with theirs base against one baton. Then the right angled batons then help to create nice square corners when assembling the completed walls together (I also remember reading another other article somewhere, where lego style building blocks have been used to make a right angle and used in a similar manner).
One final thing to add is, don’t be afraid to cut and shape the standard components. Initially I had a few unwanted snaps and breaks of those precious pieces that had been carefully de-moulded which brings a bit of a sinking feeling. But don’t despair when this happens, you can just glue them back together, you will be amazed how you can rescue these parts, often leaving no trace that they were ever snapped. You will soon get a feel for it, and develop your own technique for cutting the parts, and suddenly those more challenging builds don’t appear to be so daunting. The best way to start is perhaps with some roof sections or plain wall sections.
Anyway, I hope you like my grocery store, I still need to add a store name on it somewhere. And I am now planning my next build which will be a dwelling of similar construction to the store, i.e. stone main walls and with lap wood facings, but for this building I plan on creating an “in-set” roof, and will share some pictures soon.
And looking forward to seeing how other members are getting on with your own builds and stories