
CUSTOM LINKA COMPATIBLE - Curved Casts |

|
This is the second in the series on how to build custom Linka models, casts and compatible elements.
In this How-To I an going to describe the method I use for making curved tiles. One thing to note the material used is a polyester resin commonly called bog or Automotive body filler. The reason I prefer this to one of the plasters for this type of job is its plastic characteristics, when cured it feels fairly hard and can be broken. But if we apply careful heat from a hair dryer the material becomes flexible, and any miss-match in the radius to create a full circle as sometimes the distortion caused when curving can vary from tile to tile
In this How-To I an going to describe the method I use for making curved tiles. One thing to note the material used is a polyester resin commonly called bog or Automotive body filler. The reason I prefer this to one of the plasters for this type of job is its plastic characteristics, when cured it feels fairly hard and can be broken. But if we apply careful heat from a hair dryer the material becomes flexible, and any miss-match in the radius to create a full circle as sometimes the distortion caused when curving can vary from tile to tile
|
Brought to you by timbologist

Photo 1 - Linka curved Tiles
Do you have a build workshop ?
If you have a project that you think would be good for our other members all you need to do is make contact and we can sort out you sending in you images and some rough text, we will then write up an article like this one and publish it for everyone to share. Just use the contact form on this website. |
Starting the Linka Curved Tiles process
Photo 1 to the left shows a selection of the tiles we are making in this build project. Figure 1 Shows the calculation needed to ensure that we achieve a full perfect circle, although technical we need to ensure everything is going to line up correctly we are trying to construct a full circle within the tile width limits each tile has an effective width of 32 mm as can be seen in Figure 1: in my case I wanted a diameter of 50 mm outside the tower in OO scale which is 3.81 metres or 12.5 feet. From the calculations we end up with 4.9 tiles which is not a good idea. It is best to work in standard tiles and not have to cut them. The other thing I shall mention here is that the Linka tile system is based on a 1 unit is 3.2 mm I wont go into the how and why here but I'll see if I can get it put in a relevant part of the site. This means you can also work out sizes according to this unit and pick tiles of different widths to make up your circle. In this example case the I used full width tiles to make it easier to explain. so the nearest is 5 tiles so when we work back we end up with an outside diameter of 51mm so this is good. Again from Figure 1 we see that there is 2mm wall thickness of the mould where our tile is being cast, so we need to add this to our outside diameter, and we end up with 55 mm inside diameter. The mould is 5mm thick so we need an inside former of 45mm |
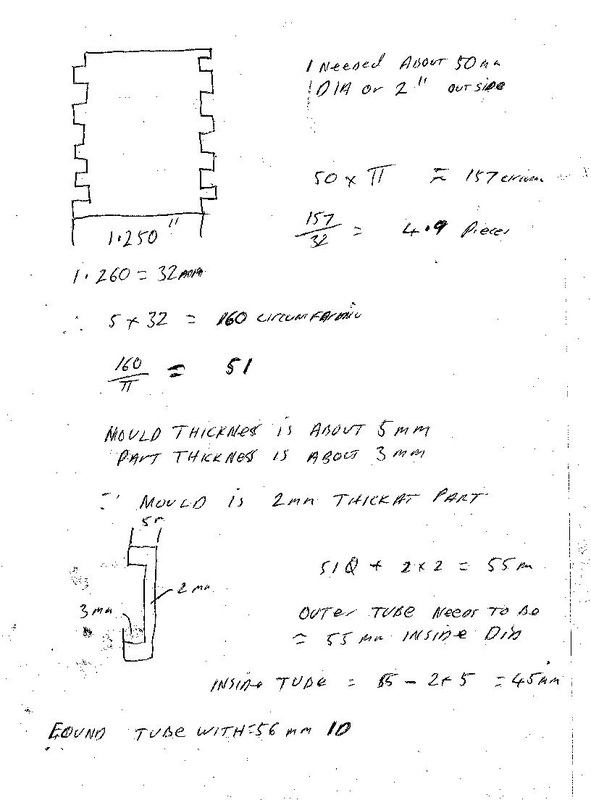
Figure 1
Please note that I prefer to use solid faced formers on the inside and outside of my moulds this gives better and more consistent results. as you will see in the instructions that follow
|
|
Step 01
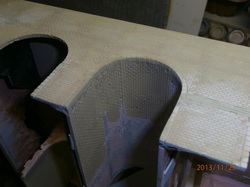
The image below shows all the elements we are going to use so Shows a view of the mould a none stick backing sheet the inner and outer former and the clamp. 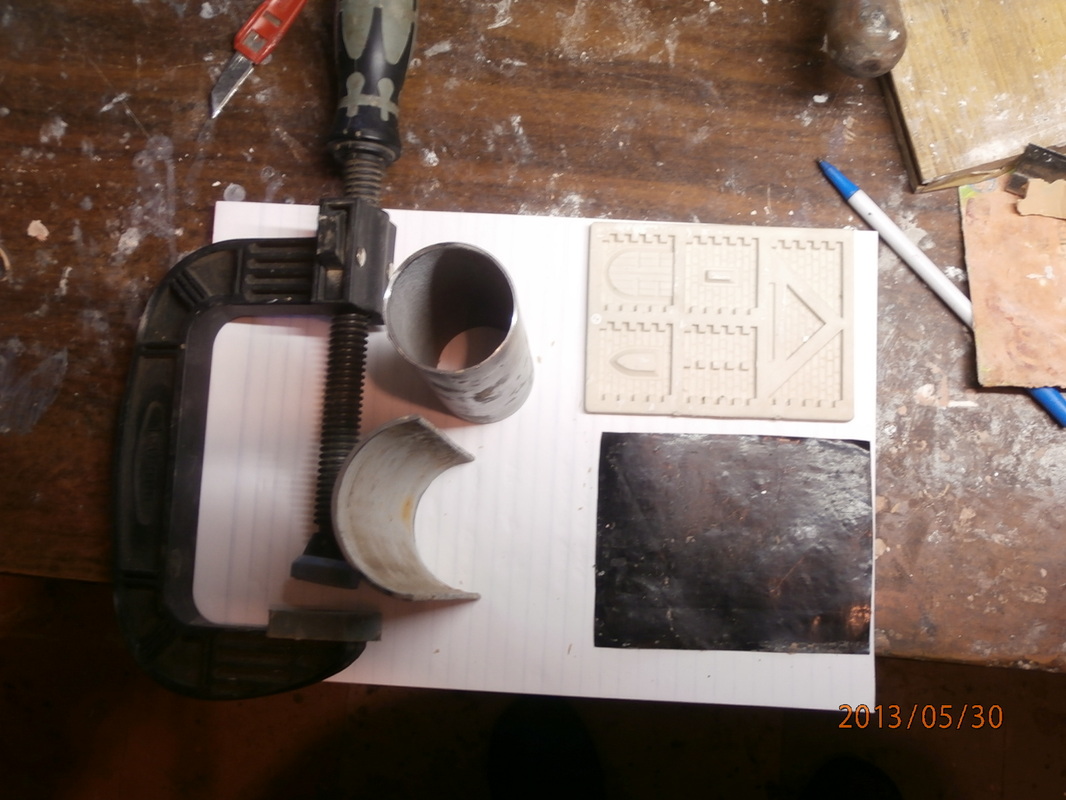
Photo 2
|
Step 02
Please note the steps below are using a different Linka mould, that's only because these are stock images, you will be using the correct stone mould here.
|


Photo 6: and Photo 7 Show views of the mould clamped in the former's it is very important that the mould sits square in the former's or your tiles won't fit together you end up with a spiral. But as mentioned before if using bog or some other form of plastic you can warm it up and get it back into shape. But those who use plaster there is no return from a crooked casting.
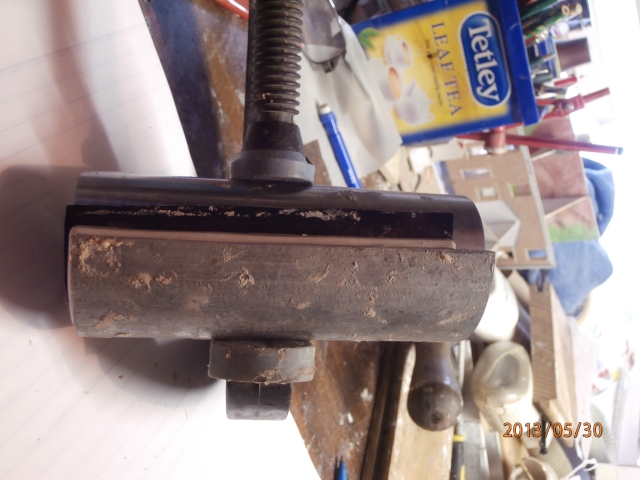
Photo 6
|
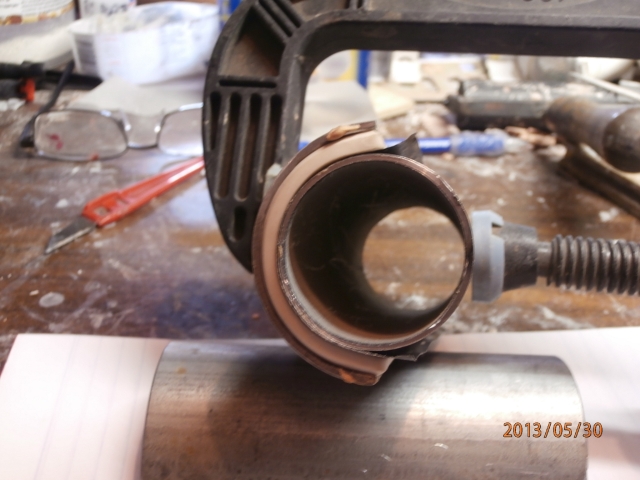
Photo 7
|
Well there we go, all you need do now is let everything set and remove your casts, as normal you will need to clean the rough parts with a file but if you have followed everything here you should be off creating your curved tiles in no time, remember practice makes perfect.
For further inspirationRemember you imagination is your greatest tool, so just for inspiration you can see here I have not only curved the casts along their length, but also cast them curved inwards.
this same procedure applies to the reverse texture on the inside so care must be taken because the way the mould is bent the texture is on the inside of the tile and can become longer. also as the strongest part of the mould is on the inside and we are stretching the outer surface the cavity side. Well I have given you a taster here of what can be achieved, I hope you will try these methods out for yourselves, who knows you may be writing us a build workshop of your own. |
|