
Creating Quoines Casts - Linka Compatible |

|
Before reading this How-To we suggest you read the first project workshop CUSTOM LINKA COMPATABLE TILE MOULD MAKING
I will not go into describing how to make the actual window and its moulds as this is described in that document The windows are different but the methods are the same.
I will not go into describing how to make the actual window and its moulds as this is described in that document The windows are different but the methods are the same.
|
Brought to you by timbologist

Completed 30-11-2013
|
Firstly I glued 4 tile casts (no 30 from old C1 moulds or S1 from the new moulds numbering system) which is the stone full size tile, I then filled and re-cut the mortar courses in the joined tiles as can be seen in photo 1. You will notice I use an aid to get the tiles square, it's made from perspex but you can use other materials, the packing tape is to protect the surface as most glues won't stick to it, and when it gets to bad just replace it.
|

Photo 1 - 4 Linka Sone casts
|
|
I then got the drawing of the window and its inset panel I had done in Sketchup I made 3 copies first to make the window as described in CUSTOM LINKA COMPATABLE TILE MOULD MAKING, the second was glued to the 4 tiles of the inset panel and the third was glued to a piece of photo matte board which in this case is 1.35mm thick. The thickness of the card determines the amount the custom stonework will protrude above the main stone work.
I then cut out the window section in the 4 tiles using a scroll saw then filed the aperture to the final size and shape, then built the window in this aperture as described in CUSTOM LINKA COMPATABLE TILE MOULD MAKING. |
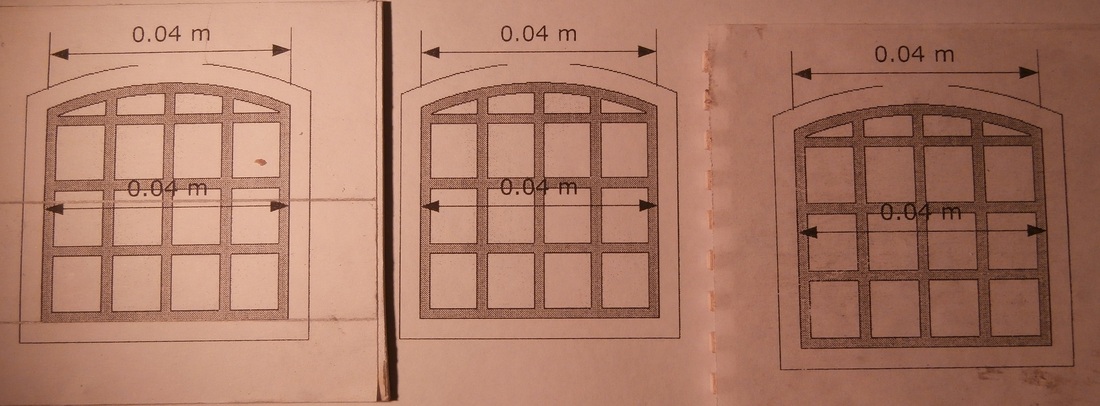
Photo 2 - shows the 3 templates the left is glued to the matt board the centre is to create window upon and the third is glued to the 4 tiles.
|
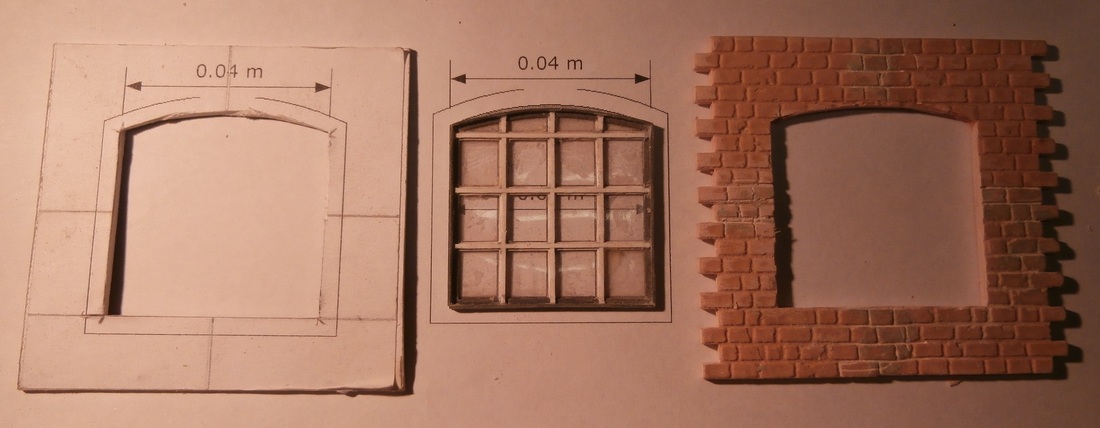
Photo 3
|
The layout
The hole in the matt board was cut out using a very sharp Exacto knife ( the cutting edge has been honed, deadly sharp ), and checked by sitting over the now complete window insert. Photo 3: Showing the holes cut in the matt board and the 4 tiles and the completed window |
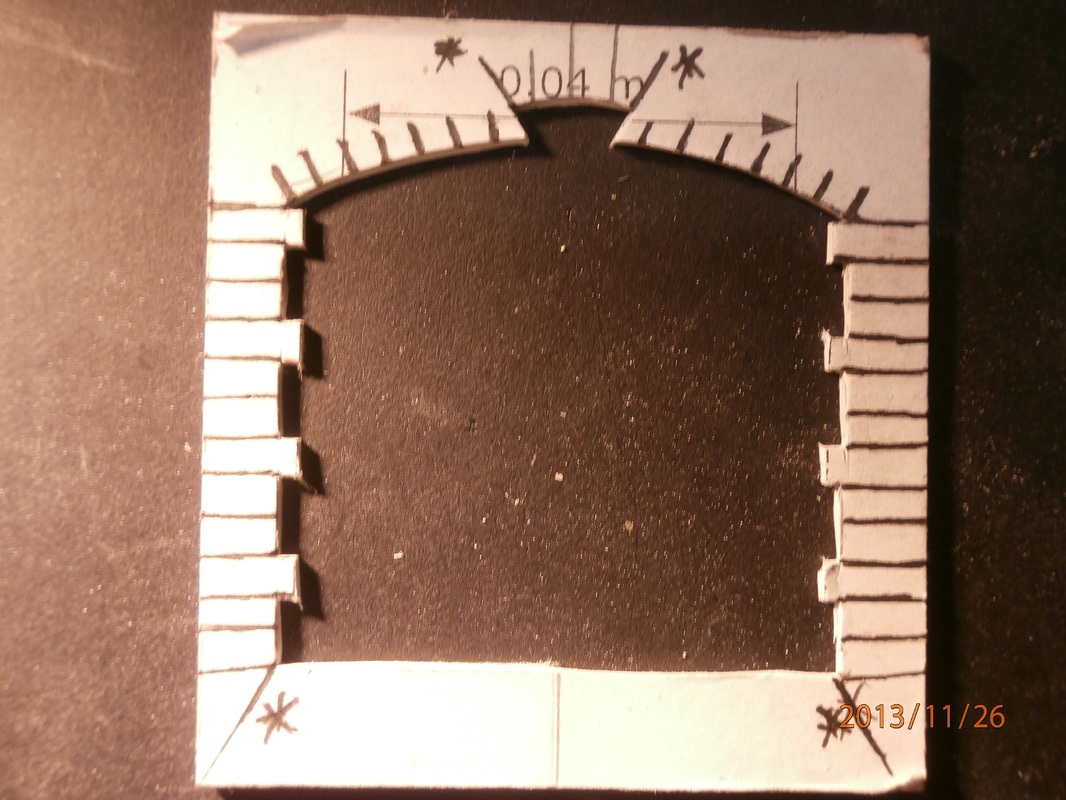
Photo 4
|
Photo 4: The 4 tiles and the matt board are clamped together and then the position of the course lines are marked onto the matt board plus a vertical centre line.
Photo 5: I then removed the matt board from tiles then marked out the pattern that I required on the front of the window frame and cut this out. NOTE As far as the formwork goes for plaster, I would recommend if using cardboard to seal it with something shellac or a varnish or paint to stop the moister wrecking it. |
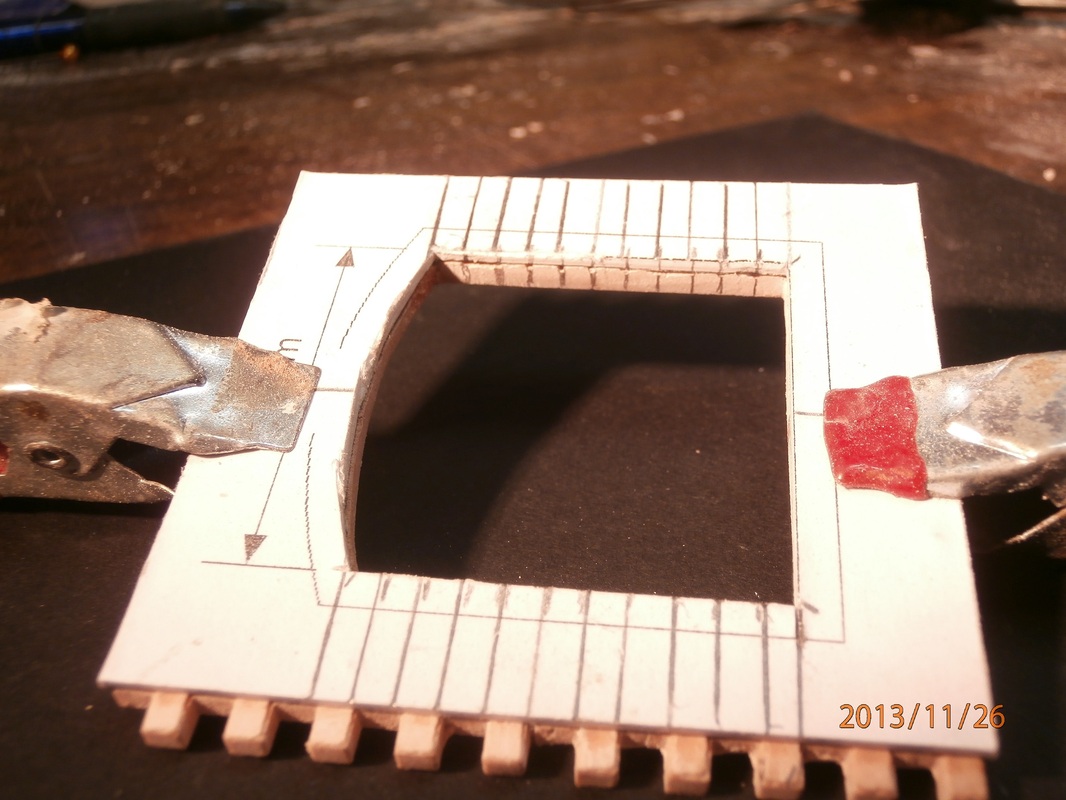
Photo 5
|
Photo 6
|
Photo 6: This formwork was then clamped firmly to all 4 of the tiles.
Photo 7: In my case I filled with body filler(you may use whatever plaster or filler you wish). when set I sanded the front face and around the window edge so the filler was flush with cardboard and the cutout window edge. then transferred the lines for the mortar lines onto the filler, removed cardboard formwork and cut the mortar lines with a razor saw including those that go back into the window hole. The thickness of the saw blade will depend on the look you want to achieve. |
Photo 7
|

Shows the completed window with its QUOINES ready to make a mould of the whole thing if you wish
|

shows a complete wall fitted with these highly decorated windows.
|
We hope you will let you imagination run free and be creative and that this how to project has given you insights into what can be achieved.
remember you can use the Forum if you want to talk about anything with anyone
remember you can use the Forum if you want to talk about anything with anyone